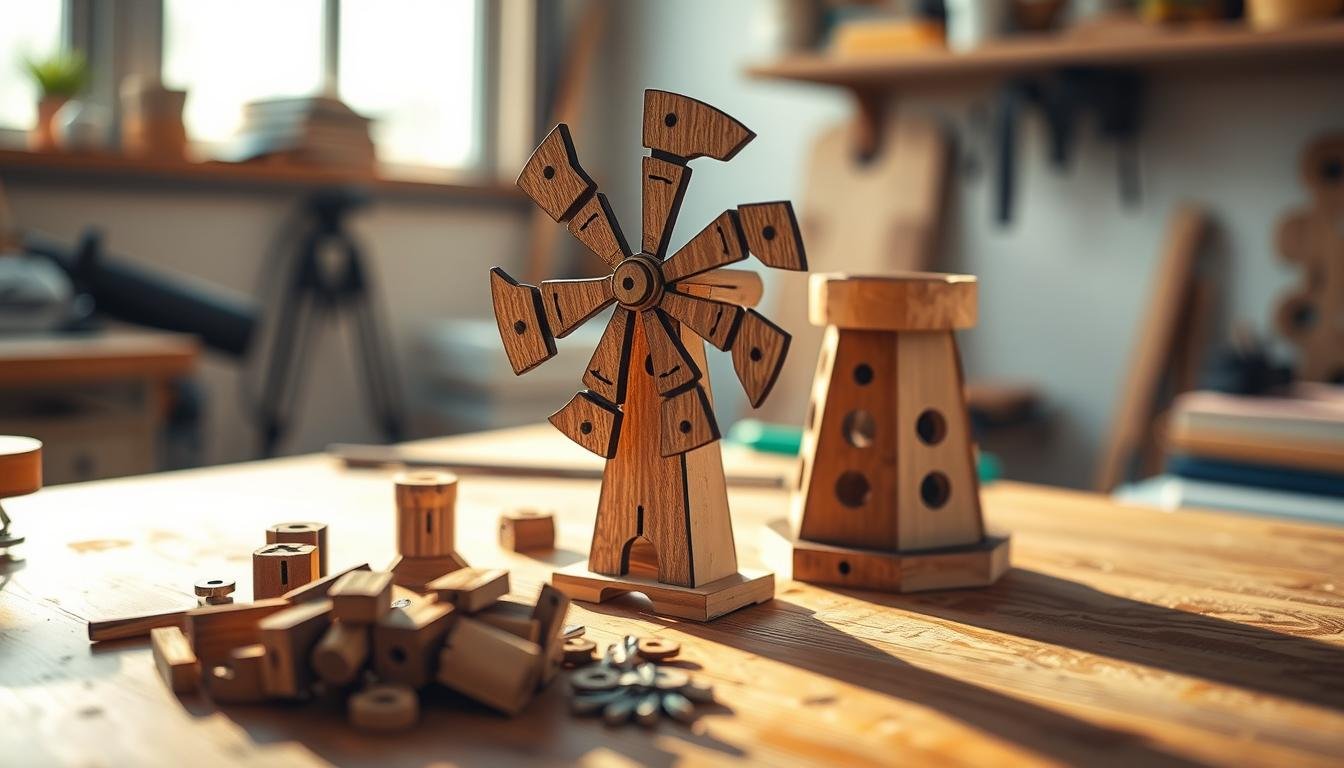
Ever thought of adding a bit of magic to your space? Making a mini windmill is a fun DIY project. It brings charm to your area and lets you show off your creativity.
With simple materials and tools, making a windmill is easy and enjoyable. It can be a cute decoration or a beautiful garden feature. Let’s explore how to make this delightful project together!
Getting Started: Materials Needed for Your Mini Windmill
To start my mini windmill project, I collect all the necessary materials. I need wood boards for the base, screws for assembly, and a dowel for the axle. A strong base plate keeps it stable, and paint or stickers add a personal flair.
Having different paint colors makes the windmill look great. I also gather craft items for extra decorations. For building, I use a saw for wood, a drill for holes, and paintbrushes for the finish.
Being organized helps me work better and build faster. With everything ready, I can focus on making my mini windmill without any delays.
Step 1: Designing Your Windmill Blueprint
The blueprint phase is key in starting my windmill project. I start by designing my windmill blueprint. This ensures I see the look and function of the structure. Traditional designs often have big blades and a round tower. Modern styles might have sleek shapes and simple designs.
Looking at different windmill designs helps me choose what I like. It also helps me meet my project’s goals.
When I draw my windmill blueprint, I focus on measurements and proportions. Each part must fit right during assembly. This means precision is very important.
Blade shapes, like rectangles or triangles, can change how the windmill looks and works. Using graph paper helps me keep everything in scale. This way, every part of the windmill fits well together.

Step 2: Cutting and Preparing the Components
In this part of my mini windmill project, I focus on step 2: cutting and preparing the components. The first task is to gather all necessary materials according to my design blueprint. I make sure to measure accurately, so every piece of wood is cut precisely.
Using a saw with a steady hand helps me get cleaner cuts. This is key for any woodworking for windmills. I also wear safety goggles and gloves to protect against accidents.
After cutting my pieces, I move on to sanding the edges. This step not only makes my windmill look better but also removes any sharp corners. A smooth finish makes the components fit together well during assembly.
With each step done carefully, I lay the groundwork for a successful build. This attention to detail is what makes my project stand out.

Step 3: Assembling the Windmill Structure
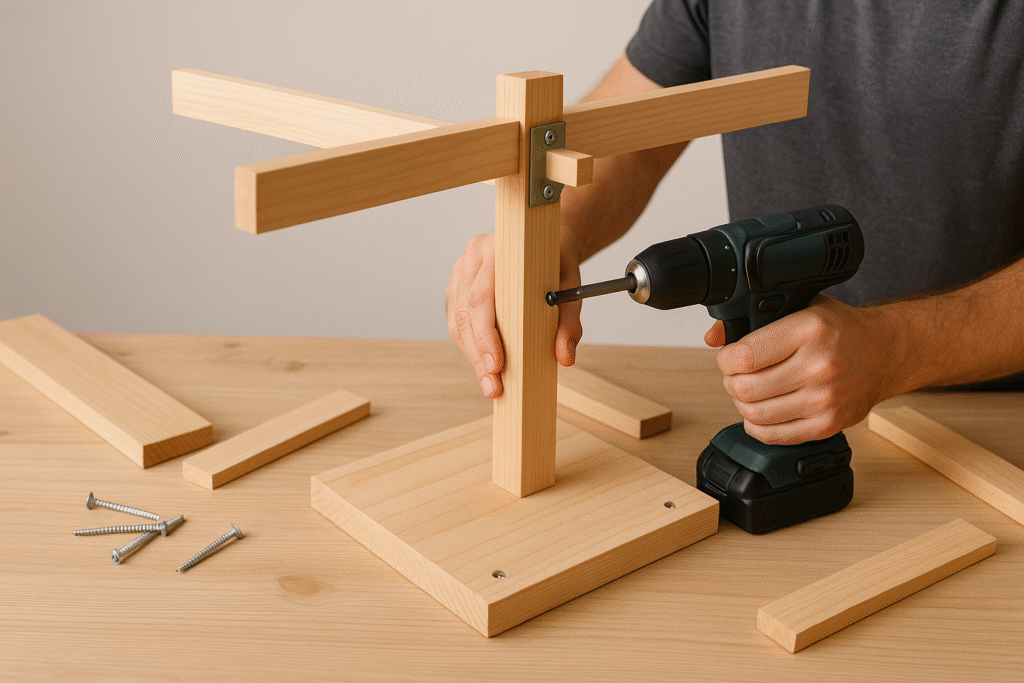
Now we get to the fun part: putting together the windmill. I’ll show you how to assemble each part with a detailed guide. Start by attaching the base to make sure it’s strong. Use wood screws and remember to drill pilot holes first. This helps avoid splitting the wood.
Then, attach the vertical post in the base’s center and screw it tight. This post is key to your windmill’s stability. To make things easier, organize your materials before starting.
After the post is set, attach the horizontal arm. This arm will hold the blades, so it needs to be stable. Adding brackets for extra support is a good idea. Once everything is in place, check each connection to make sure it’s secure. Your windmill structure is now ready for the next steps!
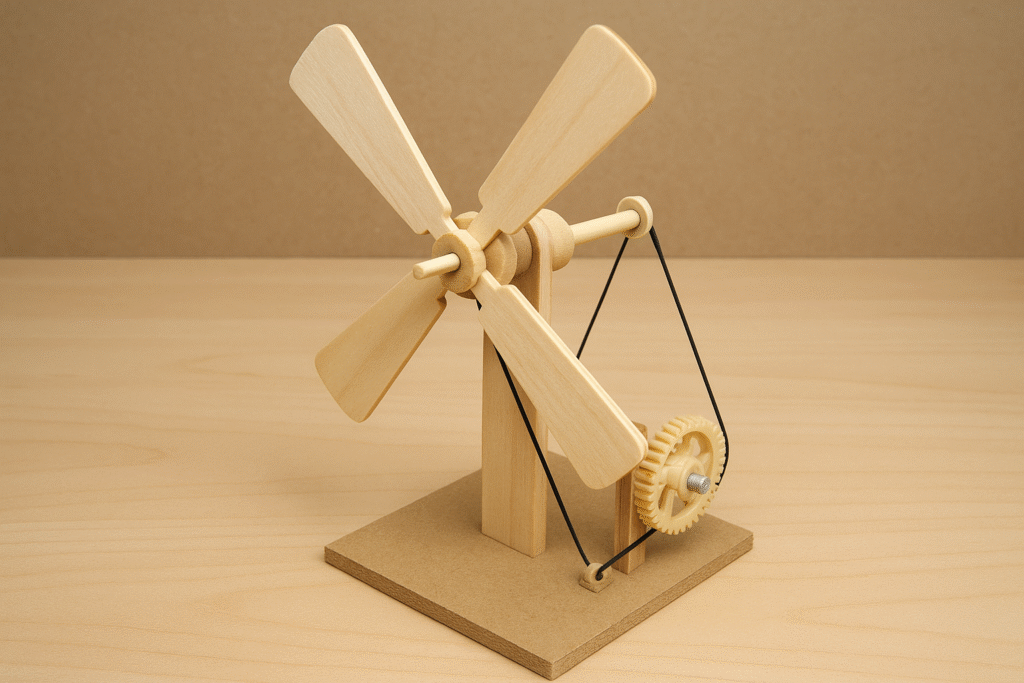
Step 4: Windmill Mechanisms: Adding the Blades and Mechanism
In this stage, I add the blades and mechanism to my mini windmill. It’s important to know about windmill mechanics. The design of the blades greatly affects how well they work.
I look at different shapes and sizes for the blades. I make sure they fit well with the rest of the windmill for the best results.
Installing the blades is a key step. I pick materials that are light but strong. Then, I cut the blades to shape and attach them to the axle.
It’s important to space the blades evenly. This helps the windmill turn smoothly when the wind blows.
After that, I add tension to the blades. I check how they move and make sure they catch the wind well. I test the windmill often and make changes as needed.
Step 5: Finishing Touches: Painting and Decorating Your Windmill
painting and decorating your windmill is the most fun part. Choosing the right paint is key. I suggest using high-quality, weather-resistant paint for outdoor use. Rust-Oleum offers many colors that last well and cover well.
After picking my paint, I think about fun DIY decoration ideas. I might use painter’s tape for cool patterns. I could go for a nautical look or a whimsical garden theme. Using contrasting colors makes my windmill pop.
Personalizing my windmill is important, but I also avoid common mistakes. Rushing the drying or skipping primer can mess up the finish. A clear sealant keeps the paint bright and protected. With these tips, my windmill will be a masterpiece I’m proud to show off.